


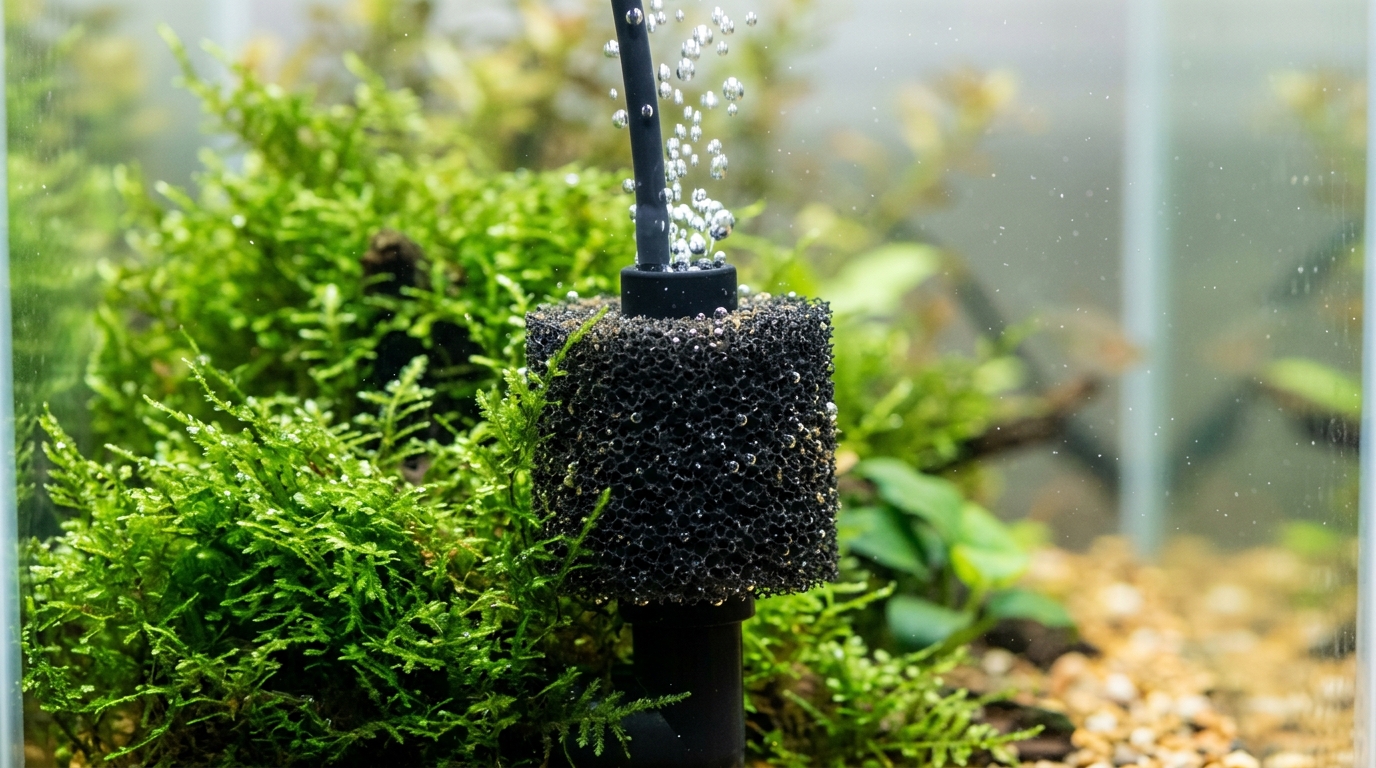
In a hobby filled with high-tech motorized filtration systems, sophisticated canister pumps, and computerized smart controllers, one of the most effective, reliable, and indestructible filtration tools remains a classic piece of foam powered by simple air. Sponge filters have been a staple of professional fish breeders, shrimp keepers, and aquatic laboratories for more than fifty years. Understanding how an air-driven sponge filter functions, how to install it safely, and how to maintain its microbial colonies will transform your approach to aquarium water clarity and biological balance.
The Airlift Principle: How Physics Powers a Sponge Filter
To understand how a sponge filter pulls debris and dirty water through its foam pores, you must understand the physics of the airlift mechanism:
- An external air pump pushes pressurized air through thin silicone airline tubing down to the base of the sponge filter.
- As air enters the hollow central core of the filter, it escapes upward through a vertical lift tube in the form of rising bubbles.
- Because air is significantly less dense than water, rising bubbles rapidly displace the water column inside the tube. This upward movement generates a powerful localized vacuum at the base of the lift pipe.
- To equalize pressure, surrounding tank water is continuously sucked inward through the outside walls of the porous foam cylinder.
- As water flows through thousands of microscopic foam pores, suspended particles are trapped mechanically, while dissolved ammonia and nitrites are consumed by biological biofilm colonies living across the foam matrix.
Anatomy of a Quality Sponge Filter
While sponge filters look minimalist, high-grade models feature deliberate mechanical engineering designed to maximize water throughput and prevent floating:
- Weighted Base: A heavy plastic or ceramic-filled bottom ring that anchors the buoyant sponge securely to the aquarium floor or bare glass.
- Reticulated Open-Cell Foam: Specialized aquatic foam with pore density rated between 20 to 45 PPI (pores per inch). Coarse foam (20 PPI) catches large debris without clogging, while fine foam (45 PPI) provides phenomenal biological surface area and protects newly hatched shrimp.
- Central Hollow Core & Air Collar: Directs incoming airflow evenly around the bottom circumference so all 360 degrees of the foam cylinder pull equal water volume.
- Vertical Lift Tube: Extends toward the water surface, directing oxygen-rich return water across the tank surface to drive gas exchange.
The Two Critical Filtration Modes
1. Biological Filtration (World-Class Efficiency)
The true superpower of a sponge filter is biological capacity. A single 4-inch cylindrical foam block contains miles of microscopic internal surface area. Colonies of nitrifying bacteria (Nitrosomonas species that oxidize toxic ammonia into nitrite, and Nitrospira species that convert nitrite into harmless nitrate) flourish on the oxygen-rich surface of the foam. Because water passes over the bacteria continuously, biological conversion occurs without interruption.
2. Mechanical Filtration (Gentle and Non-Lethal)
While sponge filters cannot generate the rapid, violent suction of high-powered motorized hang-on-back filters, their gentle draw is exceptionally effective at trapping floating dust, uneaten flake fragments, and fish waste. More importantly, this gentle flow is completely harmless to living creatures. Baby dwarf shrimp (shrimplets) and newborn fry actively graze on the micro-fauna and edible biofilm coating the sponge exterior without risk of injury.
Step-by-Step Installation Guide
Required Equipment:
- Aquarium sponge filter sized to your tank volume.
- Standard 3/16-inch silicone airline tubing.
- Aquarium air pump (rated for your aquarium depth).
- Check Valve: An essential one-way safety valve that prevents back-siphoning.
- Airline flow control valve (to tune bubble speed).
Installation Steps:
- Rinse the New Sponge: Unpack the sponge filter and rinse it under lukewarm dechlorinated tap water or existing tank water to remove manufacturing dust.
- Install the Check Valve: Cut a 6-inch piece of airline tubing near the air pump. Insert the one-way check valve, ensuring the direction arrow points toward the aquarium. If power fails or the pump turns off, this valve stops tank water from siphoning onto your electrical outlets and floor.
- Connect to Sponge Core: Attach the other end of the airline to the nipple inside the sponge filter lift tube. For quiet, fine bubbles, add a small cylinder air stone to the bottom of the tube.
- Submerge and Squeeze: Place the sponge underwater. Before letting it sink to the bottom, vigorously squeeze the foam cylinder multiple times underwater with your hands. Trapped air pockets will bubble to the surface, allowing water to saturate the foam completely. The unit will sink firmly into position.
- Plug In and Adjust: Plug in your air pump and use the control valve to set a steady, rhythmic bubble stream.
Proper Cleaning Protocol: Protecting Your Biological Colony
The single most dangerous mistake hobbyists make with sponge filters is washing them under hot running kitchen tap water. Municipal tap water contains chlorine and chloramine—potent chemical sanitizers designed to sterilize drinking water. Running chlorinated water through your sponge filter instantly annihilates your beneficial bacterial colonies, causing an immediate ammonia spike and tank crash.
Safe Cleaning Procedure:
- Perform your scheduled partial water change, collecting 1 to 2 gallons of old tank water in a clean bucket.
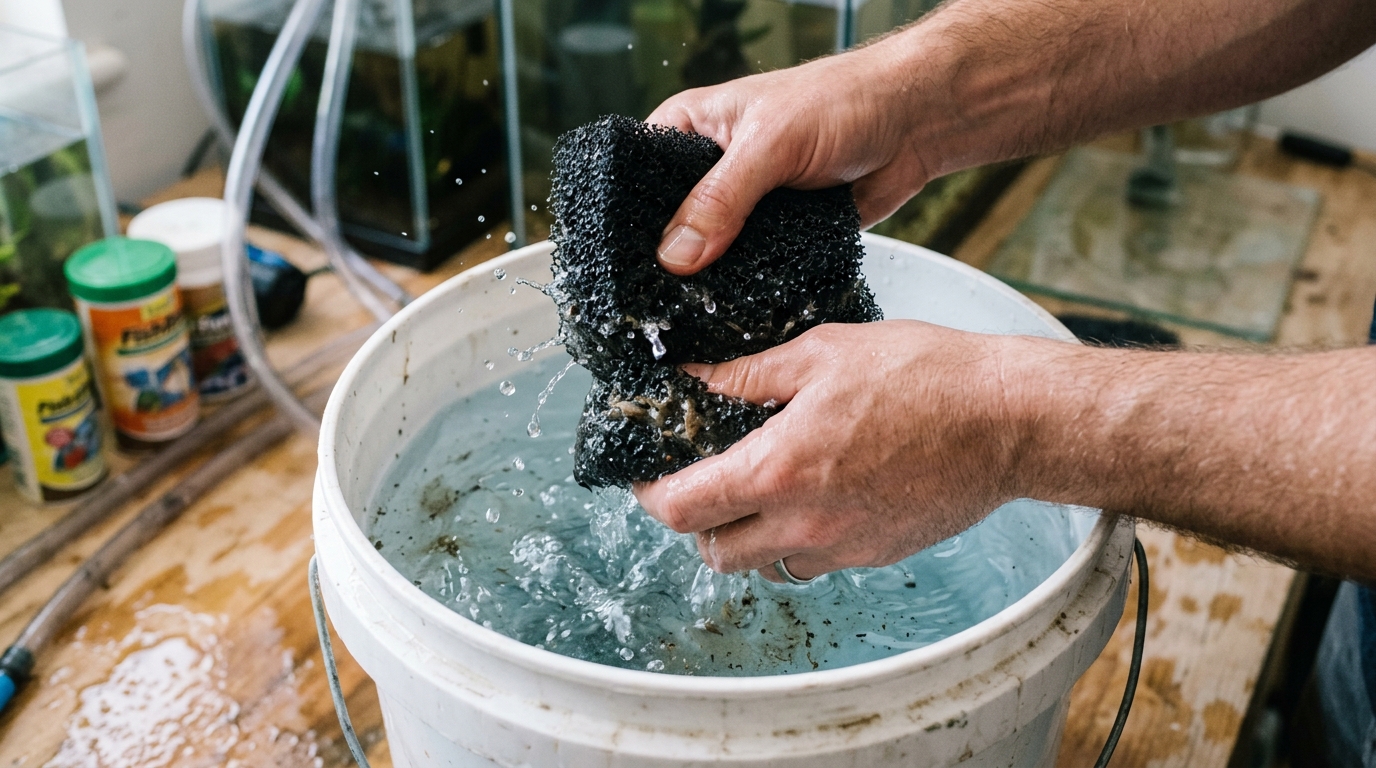
- Disconnect the sponge cylinder from its base and transfer it into the bucket of old aquarium water.
- Squeeze the sponge firmly 5 to 8 times underwater in the bucket. The water will turn dark brown with accumulated organic mulm.
- Slide the clean, saturated sponge back onto its weighted core inside your display tank.
- Repeat this process every 3 to 6 weeks, or whenever you notice reduced bubble output from the lift tube.
Filtration Type Comparison
| Filter Type | Biological Strength | Shrimp & Fry Safety | Power Outage Risk | Maintenance Ease |
|---|---|---|---|---|
| Sponge Filter | Outstanding (huge surface area) | 100% Safe (Safe grazing surface) | Zero mechanical failure risk; easy USB backup | 30-second squeeze in bucket |
| Hang-On-Back (HOB) | Moderate (limited media tray) | Moderate (requires intake pre-filter sponge) | Motor may fail to re-prime after outage | Requires cartridge/media rinsing |
| Canister Filter | High (large media trays) | Low (strong intake suction needs mesh guard) | Bacteria die if oxygen depletes inside canister | Laborious disassembly & hose cleaning |
Frequently Asked Questions
Are sponge filters powerful enough for a 20-gallon or 40-gallon tank?
Yes. While one small sponge filter is typically rated for up to 10 gallons, large dual-sponge bio filters or running two separate sponge filters placed on opposite corners can effortlessly filter aquariums up to 55 gallons, especially for peaceful community fish, planted setups, and breeding colonies.
Can a sponge filter over-oxygenate an aquarium?
No. Water reaches a natural oxygen saturation threshold governed by water temperature and atmospheric pressure. Extra bubbles simply improve surface gas exchange and carbon dioxide dissipation without causing gas bubble trauma in healthy fish.
How often should I replace the foam on my sponge filter?
Unlike disposable filter cartridges that manufacturers recommend tossing monthly, high-quality reticulated aquarium foam lasts for 3 to 5 years or longer. You should only replace the foam if it physically deteriorates, loses its structural springiness, or tears apart during rinsing.
Recommended Related Guides & Resources:
Continue building your freshwater fishkeeping knowledge with our related walkthroughs:
- Explore our comprehensive guide on how to use a gravel vacuum siphon.
- Check out our essential walkthrough on how to clean a fish tank safely.
Educational reference: Consult official physics of fluid airlift pump mechanisms for deeper biological background.