
Setting up a brand-new freshwater aquarium is an exciting and creative experience, but there is one crucial biological foundation every beginner must understand before introducing any fish. That essential process is known as the nitrogen cycle. Many enthusiastic beginners make the common mistake of adding fish to a tank filled with fresh tap water on day one, only to discover that water clarity rapidly degrades. In this detailed guide, we will walk you through exactly how to cycle a new aquarium step by step so that you can create a safe, stable, and naturally self-sustaining environment where aquatic pets can thrive.
Key Takeaways & Quick Reference
- The Goal: Establish invisible colonies of nitrifying bacteria that convert deadly ammonia into nitrite, then into harmless nitrate.
- Fishless Method: Dose pure household ammonia or fish food flakes into an empty tank to establish bacteria without subjecting fish to harm.
- Timeframe: A thorough biological cycle typically takes between 2 to 4 weeks depending on temperature and seeded filter media.
- Completion Milestone: When 2 ppm of ammonia converts completely into 0 ppm ammonia and 0 ppm nitrite within 24 hours, your tank is officially cycled!
What Is the Aquarium Nitrogen Cycle and Why It Matters
The nitrogen cycle is nature’s biological filtration system. In the wild, streams and lakes contain billions of microscopic beneficial bacteria that continuously process animal waste and decaying organic matter. In a closed home aquarium, there is only a fixed volume of water. When fish produce waste, uneaten flakes sink to the gravel, or plant leaves decompose, they break down into ammonia. Ammonia is highly toxic to aquatic life, even in minuscule concentrations.
Fortunately, nature provides a two-stage bacterial process to keep water clean. First, specialized beneficial bacteria (primarily Nitrosomonas species) colonize your filter sponges, gravel bed, and decorations, converting ammonia into nitrite. Nitrite is also toxic to fish. Next, a second group of beneficial bacteria (such as Nitrobacter and Nitrospira) develops, converting nitrite into nitrate. Nitrate is far less harmful and is safely kept at low levels through routine partial water changes and living aquarium plants. Learning how to cycle a new aquarium step by step ensures these colonies are fully mature before any fish ever enter the water.
Supplies and Tools Needed for Fishless Cycling
We strongly advocate for “fishless cycling,” which means establishing your beneficial bacteria colonies using an artificial ammonia source rather than exposing delicate live fish to toxic water spikes. Fishless cycling is completely humane, controllable, and allows you to test your tank’s limits without causing distress to living creatures.
Gather the following supplies before beginning your cycling journey:
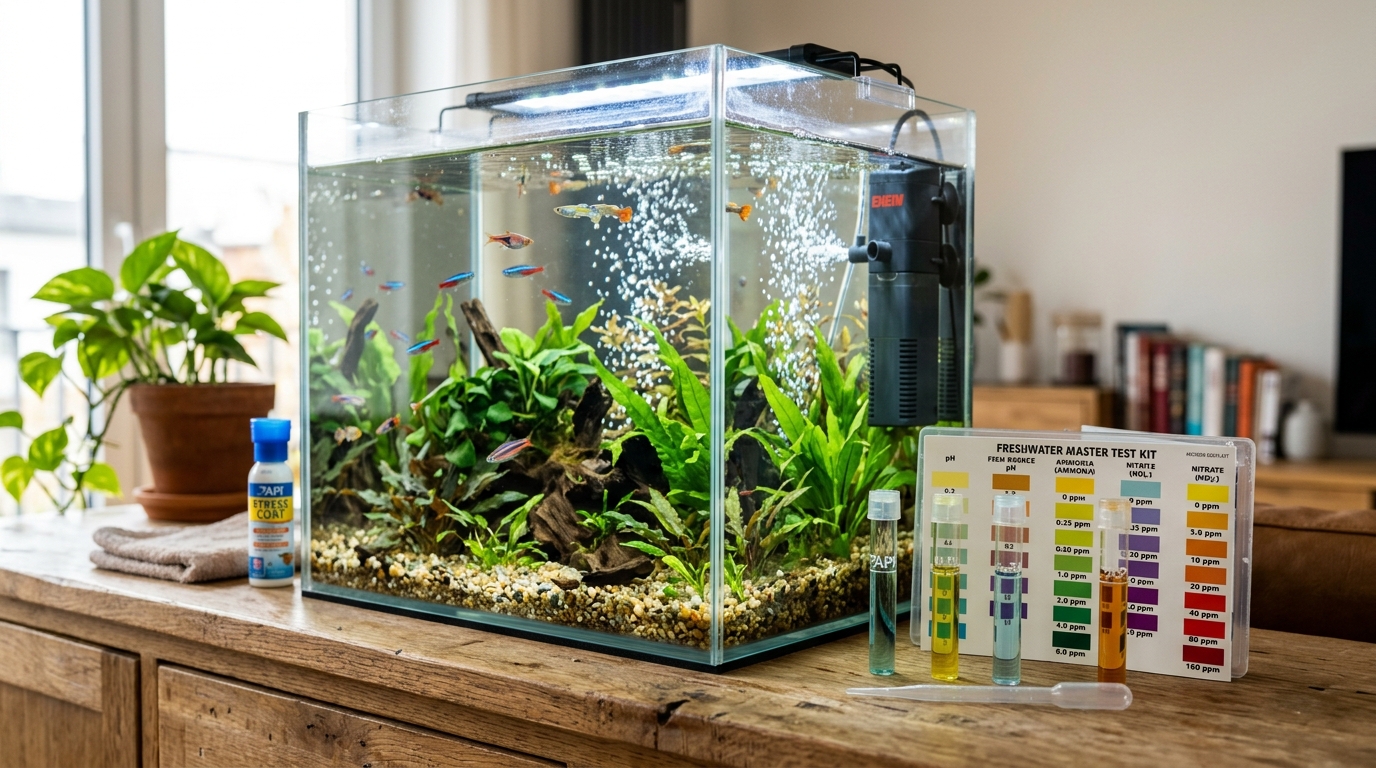
- Liquid Freshwater Master Test Kit: Liquid drop tests are far more accurate than paper dip strips. You need reliable tests for Ammonia, Nitrite, Nitrate, and pH.
- Pure Household Ammonia or Fish Flake Food: Clear, scentless, surfactant-free bottled ammonia (often labeled as aquarium ammonium chloride) allows precise dosing. Alternatively, a daily pinch of standard fish flake food can serve as a decaying organic source.
- Bottled Beneficial Bacteria Starter (Optional but Helpful): Reputable bottled nitrifying bacteria products contain live bacterial cultures that can accelerate colonization by several days or weeks.
- Running Aquarium Filter and Submersible Heater: Your filter provides the high-surface-area home and constant water flow that bacteria need to survive, while a heater set to 78°F–82°F (25°C–28°C) speeds up bacterial reproduction during the cycling phase.
- Dechlorinated Tap Water: Always treat your tap water with a quality water conditioner before running the filter, as chlorine destroys beneficial bacteria instantly.

Step-by-Step Guide to Cycling Your Aquarium
Cycling an aquarium is not difficult, but it requires consistent testing and patience. On average, the full cycling process takes between three to six weeks. Follow these straightforward steps to guide your aquarium through each stage of development:
- Step 1: Set Up and Run All Equipment: Ensure your tank is completely filled, dechlorinated, and that both your filter and heater are operating continuously. Set the heater between 80°F and 82°F, as warm water promotes faster bacterial growth. Keep the tank lights turned off to prevent nuisance algae blooms.
- Step 2: Add Your Initial Ammonia Dose: If using liquid aquarium ammonia, dose the water until your liquid test kit reads between 2.0 and 3.0 parts per million (ppm). If using fish flakes, drop in a generous pinch of food each morning so it can decompose on the gravel.
- Step 3: Add Beneficial Bacteria Supplement: Shake your bottled bacteria starter well and dose it according to label directions, ideally pouring it directly into your filter compartment so the bacteria can settle onto the sponges and ceramic biomedia.
- Step 4: Monitor the Ammonia Drop: Test your water every two to three days. For the first week or two, ammonia levels will remain elevated. Once the first wave of bacteria establishes itself, your ammonia readings will begin dropping toward zero.
- Step 5: Watch for the Nitrite Spike: As ammonia decreases, test for nitrite. You will see nitrite levels climb steeply, often exceeding the maximum reading on your test chart. This is completely normal and indicates that your first bacterial colony is working properly.
- Step 6: Maintain the Ammonia Supply: Do not let your bacteria starve while waiting for nitrites to drop. Whenever ammonia tests below 0.5 ppm, add a small dose to bring it back to roughly 1.0 to 2.0 ppm.
- Step 7: Confirm Nitrate Appearance and Final Cycle Completion: After several weeks, your nitrite readings will suddenly plunge to zero, and your nitrate test will turn an unmistakable orange or red (showing 10 to 40 ppm).
| Stage | Primary Chemical | Beneficial Organism | Target Level at Completion |
|---|---|---|---|
| Stage 1: Waste Breakdown | Ammonia (NH3 / NH4+) | Nitrosomonas bacteria oxidize ammonia | 0.0 ppm (Completely undetectable) |
| Stage 2: Nitrite Transition | Nitrite (NO2-) | Nitrobacter bacteria oxidize nitrite | 0.0 ppm (Completely undetectable) |
| Stage 3: Nitrate Accumulation | Nitrate (NO3-) | Exported via weekly water changes & plants | Under 20 ppm (Controlled via maintenance) |
How to Confirm Your Tank Is Truly Cycled and Ready for Fish
To be 100% certain that your biological filter is robust enough to handle the waste of live fish, perform the final “24-hour clearance test.” Dose your aquarium with pure ammonia up to 2.0 ppm. Test the water precisely 24 hours later. If both Ammonia and Nitrite read exactly 0 ppm, and Nitrate is present, your aquarium is officially cycled and biologically mature.
Before introducing your first fish, perform a generous 30% to 50% partial water change using temperature-matched, dechlorinated tap water. This removes the accumulated nitrates, bringing your water parameters into the ideal, healthy range for your new aquatic companions.
Common Cycling Mistakes and How to Avoid Them
Because the biological processes happening inside your filter are invisible to the naked eye, it is easy for beginners to make accidental errors that stall the cycle. Knowing how to cycle a new aquarium step by step includes recognizing these frequent pitfalls:
- Rushing the Timeline: Bacteria cannot be forced to multiply instantly. Never add fish simply because the water looks crystal clear; clear water can still contain dangerous invisible ammonia.
- Turning Off the Filter at Night: Beneficial bacteria require a constant flow of oxygenated water to survive. Your aquarium filter must run 24 hours a day, 7 days a week, without interruption.
- Over-Dosing Ammonia: Exceeding 4.0 or 5.0 ppm of ammonia can actually inhibit bacterial reproduction and stall your cycle completely. If your ammonia is too high, perform a small water change to dilute it.
- Allowing pH to Drop Below 6.5: Beneficial bacteria consume carbonates as they work. If your water’s pH crashes below 6.5, the cycling process can grind to a halt. Test pH regularly and maintain moderate hardness.
- Replacing Filter Cartridges Too Early: Throwing away dirty filter pads discards your newly grown bacterial colony. Simply squeeze and rinse sponges in a bucket of old aquarium water during maintenance.
Frequently Asked Questions (FAQ)
How can I speed up the nitrogen cycling process safely?
You can cut cycling time in half by adding “seeded media” (such as a seasoned sponge or ceramic bio-rings) from an established, healthy aquarium, or by dosing bottled nitrifying bacteria starter alongside pure ammonia.
Why did my aquarium water turn cloudy during the cycle?
A milky white haze is a natural bacterial bloom as free-floating heterotrophic bacteria rapidly multiply. Read our troubleshooting guide on why is my aquarium water cloudy and how to fix it to understand why this clears on its own.
Do I change the water while the tank is cycling?
Only if ammonia or nitrite climbs above 5 ppm, which can stall bacterial growth. Otherwise, leave the water untouched until both ammonia and nitrite drop to 0, then perform a 50% water change before adding fish.
Conclusion
Taking the time to understand how to cycle a new aquarium step by step is the single greatest investment you can make in your fishkeeping hobby. While waiting several weeks requires patience, the reward is an ultra-stable, crystal-clear aquatic habitat where your fish can live peaceful, vibrant lives from their very first day home. Treat the cycling phase as an exciting first chapter of your aquarium journey. With consistent testing, calm observation, and natural biological balance, your new freshwater tank will be an enduring source of relaxation and pride.
Recommended Related Guides & Resources:
Continue building your freshwater fishkeeping knowledge with our related walkthroughs:
- Explore our comprehensive guide on how to clean a fish tank safely.
- Check out our essential walkthrough on harlequin rasbora care guide.
Educational reference: Consult official nitrifying bacteria microbiology for deeper biological background.